Hope & Gloria - Sewing Inspiration for Children

Hope & Gloria - Sewing Inspiration for Children
Happy Mother's Day UK

Sunday, October 25, 2015

Sewing Club Gallery - Autumn 2015


I love it when we reach the end of the half term and all of our school sewing club projects are completed and ready to be taken home by our smiling sewing club members!

This half term all of Team H&G have been delighted with the results of our creature cushion projects. Both beginners and experienced sewing enthusiasts alike have produced beautiful cushions which should take pride of place in the home.

An enormous well done to everyone who has joined us this half term - you have been amazing and we look forward to seeing you again next half term. Here are some of the lovely cushions that have been created by our talented club members...


The Royal School, Windsor


St Ann's Heath

Knitted Halloween!


I love the folklore behind our traditions and having recently bought our pumpkins to carve in to Jack O' Lanterns and place on the porch for Halloween I have been wondering where the tradition comes from.

The story of Jack O' Lantern is found in many cultures and basically involves a no good character called Jack who tries to trick the devil in to not taking his soul. The devil agrees and when Jack eventually dies he is not taken to hell. However, as he doesn't have a good Christian soul, he cannot go to heaven and his spirit is doomed to wander the earth. When he asks the devil how he will see where he is going the devil tosses him a burning ember from the depths of hell. Jack carves out a turnip and places the burning ember inside, Voila! The first Jack O'Lantern is made!

In the UK we often assume that the tradition of the Jack O' Lantern reached our shore from the US. However, turnips and gourds were carved in to grotesque faces/masks in the UK in the 19th century where they were believed to ward off evil spirits during the celtic festival of Samhain which fell at the same time of the year as our Halloween.

This year I have adopted a more woolly approach to Halloween and have made these super cute knitted pumpkins. They are made following exactly the same pattern as the fabric pumpkins in the tutorial I shared last October.


Click here to go to the tutorial.

To make this year's design you will need to knit your fabric in a fun shade of orange first. I used double knit wool and 4mm needles. They are incredibly easy to make and the knitted texture looks fab. I've only had time to make a couple using garter stitch but they would look brilliant made from a rib knit, or moss stitch. You could also embroider a Jack O' Lantern face on the front using black wool.

With just six days to go there's still time to make a few before All Hallows Eve - Happy Knitting!


Thursday, October 15, 2015

Terrific Toadstool Pin Cushions


These cute toadstool pin cushions have been a huge hit with our sewing club members this half term and have certainly encouraged them to keep their pins neat and tidy which is great news. T

They are a quick and easy seasonal make and ideal for using up scraps of fabric. Here's how to make them:

You will need:


1 large circle of felt (12cm in diameter), 1 smaller circle of white felt, small circles of white felt to decorate.

Step one: 

Decorate the red circle. For this toadstool I used small circles of white felt but you could also sew on buttons to give the same "spotty" effect.

Step two:


Sew small running stitches all around the outside edge of the white circle but do not finish off with a knot.


Step three:


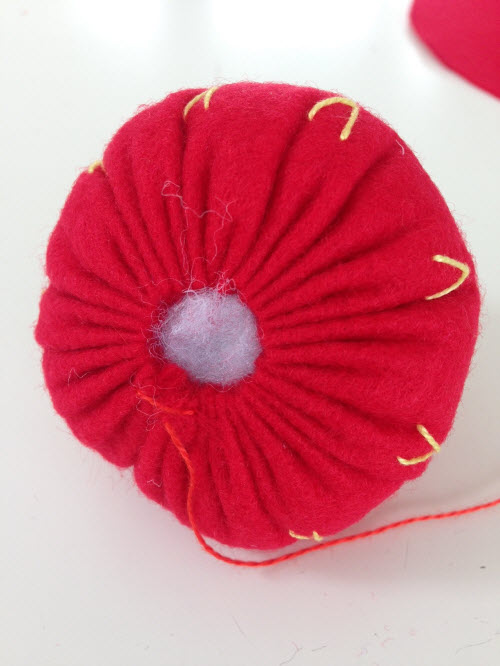
Pull the thread so that the felt gathers in to a ball shape.

Step four:


Pack with stuffing and secure with a finishing knot. You can also sew a few stitches around the edge to make sure it doesn't come undone.

Step five: 

Repeat the same process with the red felt circle.


Finally,  place the white ball under the red one with the two open edges facing. Using an overstitch sew the two balls together securely.


Your pin cushion is now complete and ready to use - hooray!

They also look fabulous as hanging Christmas decorations. Just sew a loop of thread through the top and they will add  a fun, kitsch touch to your tree during the festive season - not long to go now....!

Wednesday, October 7, 2015

Autumn Inspiration and Up-cycling Ideas


In terms of inspiration Autumn can be overlooked which is a huge shame!

Because we have to plan and work so far ahead at Hope & Gloria Sewing Clubs once Summer has said "goodbye", I tend to launch straight in to designing and making for Halloween and then Christmas.

I was with a friend earlier last week and she was talking about how much she loves the Autumn and how lovely it is to see all of the Autumn colours - the reds, the golds and the oranges merged with the vibrant evergreens. My Mum is also a huge fan and it's something she has passed on to me.

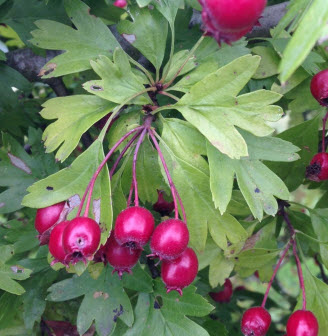
Whilst walking my dog Elsie earlier this week I noticed all of the gorgeous colours starting to emerge on trees and bushes as well as stunning berries lurking under leaves. It occurred to me that it would be a shame to ignore nature at this beautiful time of the year and so over weekend I decided to devote some time to Autumn and all that it brings before moving on to Halloween preparations.


Inspired by Mother Nature and her Autumn Palette here are a few Autumn sewing ideas that I came up with....


Fabulous Phone Cases Inspired By Autumn

The cases are made from an old woollen sweater that I machine felted. It has been sitting in a box in my workroom for possibly as long as two years waiting to be used. The dark mottled beige is the perfect backdrop for Autumn designs and highlights the autumn colours that I have used.

Machine felting a jumper is the easiest thing to do with an outgrown or preloved woolly. Make sure it is 100% lambswool to get the full felted effect and then throw it in to the washing machine on a hot wash 60 degrees or higher. When it emerges from the machine it will be half the size but ready to use once dry. The felted wool can be cut to shape and has the added bonus of not fraying unlike regular knits.

I have also included a toadstool in my phone case designs - they are cute and colourful and a delight to find when walking in the woods at this time of year. It is easy to see where the inspiration for my latest batch of pincushions came from.


I look forward to sharing a tutorial on how to make these adorable toadstools with you next week.

Happy Autumn Sewing.xx


Tuesday, September 1, 2015

Fabulous Floral Inspiration


I am without a doubt a huge fan of Mother Nature in all of her amazing glory, especially when it comes to flowers.

A week or so ago I met a friend at RHS Wisley. I am lucky enough to go there a few times a year. It is half way between our home and two of my very best friends', so it's the ideal place to meet for a wander and a coffee. Our kids also seem to enjoy it particularly watching the Koi Carp in the pond.

The displays in the flower borders this year were breath-taking - full of vibrant colour and beauty. These are just a few examples:


Who wouldn't be inspired by these fabulous blooms? I had been thinking of an idea for fabric wall art for a while and these lovely flowers were the final push I needed to get sewing.

My idea was to showcase a range of bright and bold felt and fabric flower techniques in the shape of a heart. In order to fit in a range of flowers I decided to go big - the canvas size is 50x50 which gave plenty of room to include lots of fun flowers in various colours shapes and sizes.


It was finished just in time for the Egham Royal Show which ran during the bank holiday weekend and I was over the moon to win first prize in the category that I entered. It is now hanging in pride of place in my work room at Hope & Gloria HQ. The weather is a bit dreary here today, so it's lovely to have my burst of summer colour on the wall to remind me of a sunny day at RHS Wisley.

Next week I shall be adding a fabric flower tutorial post to the blog - come back and take a look!

Monday, August 10, 2015

Summer Shows, Summer Sewing


I am lucky that my work means I can take a six week break during the summer. I love the summer for many reasons. Time to spend with my family thanks to the school hols, having a week or two away and the odd day trip, not to mention being able to have an occassional lie-in children permitting.

The school summer holidays also mean I have extra spare time to devote to projects that have been on the back burner during the school year due to concentrating on Hope & Gloria sewing clubs and everything that they involve. During my spare time since the beginning of the summer break I have been in a quilting/stitching/knitting frenzy and have completed three projects so this weekend I decided to enter them in to a local handicraft competition.

Anyone who knows me is aware that I love a village fair and over the past few years my family and I have had lots of fun going to local agricultural shows as well. I discovered the handicraft competitions a couple of years ago and last year I entered my first - the Egham Royal Show. These events are an amazing way for people to showcase their talents and hopefully inspire others to pick up a needle, a knitting pin or get their sewing machine out and get crafting.

The Chertsey Show is one of my favourites and I would highly recommend it to anyone in the area.
We had a fantastic family afternoon at the show yesterday and there really was something for everyone ranging from adorable livestock to classics cars.


A rare highland cow in the cattle tent.


Knights preparing to joust


Swing boats flying high!


Giles next to his dream car.


Stunning flowers in the horticulture marquee

I entered three categories at the show:


Knitting with my floral tea cosy

There were no prizes for this one but I am still very fond of this cute teapot cover. There were many stunning entries in the knitting category so I was happy just to showcase my project among them.


My Christmas themed cushion is hand appliqued, patchworked and quilted and then machine finished. I was delighted to achieve third place in the "stitched cushion" category.


I entered this colourful patterned bag in to the quilting and applique category and I was over the moon to win first prize.

Winning the prizes was a lovely end to a brilliant afternoon but I would highly recommend entering projects at the summer shows to anyone - it's a great way to show people why you love sewing, knitting or any type of craft and you may just inspire someone to begin a new hobby.

Monday, August 3, 2015

Super Sweet Strawberry!


In our home the start of the summer holidays is usually closely followed by fruit picking. It's a fun activity that we all join in with and it also means a tasty treat along the way.

We went fruit picking a week ago and came home laden with a basket full of raspberries which were quickly transformed in to eleven jars of delicious jam. Our efforts with strawberries were less successful and it proved to be a fruitless task (apologies for that pun).


Here is Theo demonstrating the less than inspiring pick of the crop. I guess that far more enthusiastic fruit pickers had beaten us to it this year.

However, the strawberry remains a firm favourite in our house and our fruit picking adventures inspired me to make a felt strawberry pin cushion. This is a quick and easy make - ideal for children to create on a summer's afternoon. Here's how to make it:

You will need:

Red felt, green felt scraps, yellow thread, red thread, soft toy filling.

Step one:


Cut a circle of red felt. I drew around a tea plate an ideal way to get the basic shape if you don't have a set of compasses to hand.

Step two:


Cut the circle in half and one semi circle will make a basic strawberry shape. I decorated mine with small "V" stitches to give the appearance of seeds. You could also leave it blank - the pins will also give the appearance of seeds once it's in use.

Step three:


Fold the semi circle in half with the right sides facing inwards.

Pin and sew along the straight edge. starting at the pointed end and sewing towards the curved edge. When you reach the end tie a finishing knot but don't cut the thread.

Step four:


Turn your strawberry so that the right side is facing outwards. Continue sewing running stitch around the top edge until you have sewn all the way around.

Step five


Now start to gently pull the thread until the tope edge begins to gather. Add plenty of stuffing and continue to pull the thread until it is completely gathered with just a small hole in the top centre.

Step six:


Add some stitches to make it secure and your strawberry body is complete.

Step seven:


Cut four or five leaves from the green felt and sew in to place on the top of the strawberry. If you wish to add a stalk cut a small rectangle of felt, roll it to make a stalk shape, secure with a few stitches and sew in to place on top of the leaves.


Now you have the perfect seasonal pin cushion. These lovely fruity fabric makes also work brilliantly as decorations - just sew a green thread loop through the top instead of a felt stalk.

Happy Summer Sewing!