

During the first few weeks in Hope & Gloria Sewing Clubs we aim to teach what we call "the basic skills". These are threading needles, sewing a basic running stitch and tying starting and ending knots.
Once a child can master these they can really gain a level of independence that allows their creativity to flourish.
Threading a needle is not always as easy as it looks and last year I shared a blog post on tips for making threading a needle a little bit easier. You can Click here for a refresher.
Ahead of our return to school, I thought it would be useful to share a few tips on how to tie what we call starting and ending knots in Hope & Gloria Sewing Clubs. Practice these at home and you'll be flying through exciting sewing adventures in no time!
Starting knots - There are many techniques that can be used by children to tie a starting knot. It can be difficult to make sure that the knot is placed at the bottom of the thread and it's a matter of finding a technique that they are comfortable with.
Here's one that I have found children tend to pick up pretty quickly....

1. Once you have threaded your needle pinch the bottom of the thread between your left finger and thumb.

2. Wrap the thread once around your index finger continuing to hold the end of the thread between your finger and thumb. Keep the thread slightly loose so you can slide a needle through it.

3. Carefully, slide the needle under the loop you have made, taking care to avoid scraping your finger! You can also slide the loop off your finger before threading the needle through the back of it if you find it easier.
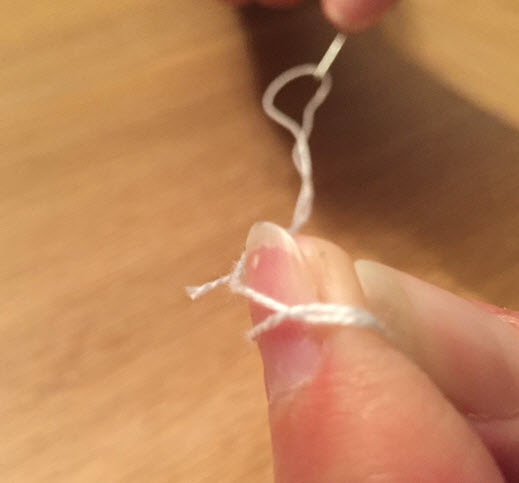
4. Pull the needle and thread all the way through.

5. Slide the loop off your finger taking care to keep hold of the end of the thread while your other hand pulls the needle.

6. Pull both ends tight and you will have a lovely knot - you're now ready to begin sewing.
Handy Hint: If you are sewing using a larger needle it will make bigger holes in the fabric, so you will need to make a larger starting knot. To do this using the technique above, at step two just wrap the thread around your finger a couple more times - this will make a fatter knot.
Ending knots - hugely important for ensuring that all that beautiful stitching doesn't come undone after all that hard work...! Here's how we do it the Hope & Gloria Way:

1. Thread your needle underneath your last stitch, or one that is very close to where you have finished sewing.

2. Pull your needle and thread through until you have made a small loop (make sure you don't pull the thread too far and pull the thread too tight).

3. Thread the needle through the back of the loop you have made and pull the thread through.
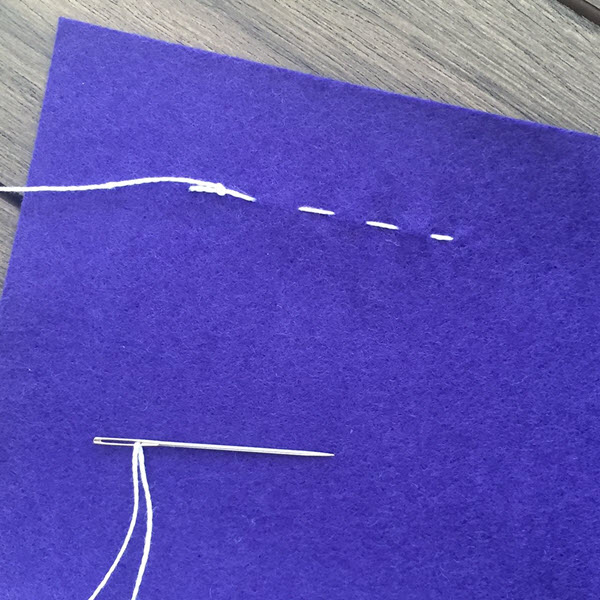
4. This time pull it tight to make a knot. The knot you have made is now anchored to the stitch, keeping it secure and none of your lovely stitches will come undone!
Happy Sewing!
No comments:
Post a Comment